


Starting a home-based fashion printing studio is an exciting way to bring your creative ideas to life and potentially launch a small business. Whether you dream of designing custom t-shirts, scarves, or unique fabric patterns, setting up a compact workspace for textile printing is more accessible than ever. With careful planning, the right equipment, and a clear workflow, you can transform a spare room or even a corner of your home into a productive studio.
This guide covers the essential steps, from choosing your printing method to organizing your workspace and sourcing materials. You’ll also find tips for maintaining quality, keeping costs manageable, and ensuring your setup is safe and efficient. For those interested in the differences between printing for fashion and home decor, the guide to digital textile printing for home decor vs fashion offers further insights.
Planning Your Home Fashion Printing Workspace
Before investing in equipment or supplies, evaluate your available space and intended workflow. A small-scale studio does not require a large area, but it does need to be organized for efficiency and safety. Consider these factors:
- Ventilation: Printing processes may involve inks, solvents, or heat. Ensure your workspace is well-ventilated, especially if you plan to use screen printing or heat transfer methods.
- Lighting: Good lighting is essential for accurate color work and detail. Natural light is ideal, but daylight-balanced LED lamps are a strong alternative.
- Surface Area: You’ll need a sturdy table for printing and another surface for drying or curing prints. Shelving or storage bins help keep supplies organized and accessible.
- Power Supply: Some equipment, such as heat presses or digital printers, require reliable electrical outlets. Plan your layout to minimize extension cord use.
Choosing the Right Printing Method for Small Studios
There are several popular techniques suitable for home-based fashion printing. Your choice will depend on your budget, desired effects, and the types of garments or fabrics you want to produce. Here are the most common options:
- Screen Printing: Known for its durability and vibrant colors, screen printing is ideal for producing multiple copies of the same design. It requires screens, squeegees, and inks, and works best for simple graphics or logos.
- Heat Transfer Printing: This method uses a heat press to transfer designs from special paper or vinyl onto fabric. It’s versatile and great for small runs or personalized items.
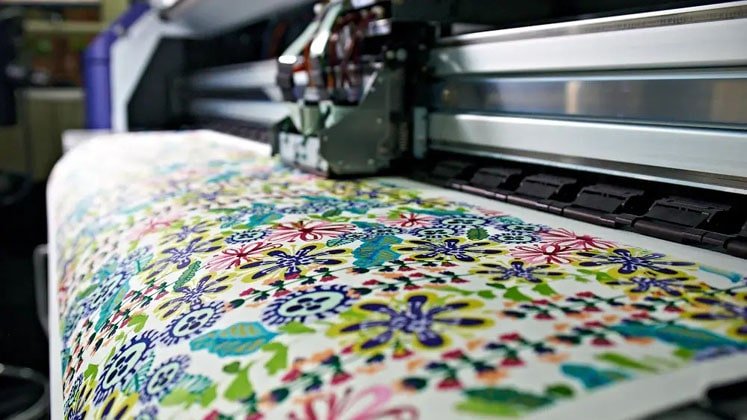
- Direct-to-Garment (DTG) Printing: DTG printers function like inkjet printers for textiles, allowing for full-color, detailed prints on cotton garments. They are more expensive but offer flexibility for complex designs.
- Block Printing: A traditional, hands-on technique using carved blocks and fabric ink. It’s affordable and perfect for unique, artisanal pieces but slower for large volumes.
For a deeper dive into the technology and trends shaping textile printing, check out this overview of digital textile printing’s impact on fabric production.

Essential Equipment and Supplies for Your Studio
Once you’ve selected your preferred printing method, it’s time to gather the necessary tools and materials. Here’s a basic checklist for a small-scale setup:
- Printing Equipment: Depending on your method, this could be a set of screens and squeegees, a heat press, or a DTG printer.
- Inks and Consumables: Choose inks compatible with your technique and fabrics. For eco-friendly options, research water-based or difference between solvent and eco-solvent textile inks.
- Garments and Fabrics: Source blank t-shirts, tote bags, scarves, or fabric by the yard. Cotton is the most common base, but blends and synthetics are also options.
- Protective Gear: Gloves, aprons, and masks help protect you from ink splashes and fumes.
- Cleaning Supplies: Keep your workspace tidy with rags, cleaning solutions, and containers for waste disposal.
Invest in quality where it matters most—especially for equipment that will see heavy use. Start small and upgrade as your needs grow.
Setting Up Your Workflow for Efficiency and Safety
Organizing your studio for a smooth workflow saves time and reduces mistakes. Arrange your workspace in logical zones:
- Design Area: Use a computer or sketchpad to create artwork. Software like Adobe Illustrator is popular for textile repeats; learn more about how to use Adobe Illustrator for textile repeats.
- Printing Zone: Set up your main equipment here. Keep inks, tools, and blanks within easy reach.
- Drying/Curing Space: Allocate a flat surface or rack for prints to dry. If using heat, ensure the area is heat-resistant and ventilated.
- Finishing and Packing: Once prints are cured, inspect for quality, fold, and package finished items.
Always follow safety guidelines for your chosen printing method. Proper ventilation, regular cleaning, and safe handling of chemicals are essential for a healthy workspace.
Tips for Achieving Professional Results at Home
Even in a compact studio, you can produce garments and fabrics that rival commercial quality. Here are some best practices:
- Test Prints: Always do a test run on scrap fabric before printing on your final product. This helps you check color accuracy and alignment.
- Consistent Settings: Record your ink mixes, temperature, and pressure settings for repeatable results.
- Quality Control: Inspect each item for smudges, misprints, or color inconsistencies. Small issues can often be fixed before curing.
- Experiment: Try different fabrics, inks, or effects—such as metallic finishes. For ideas, see tips on how to achieve metallic effects without foil.
Stay organized by labeling your inks and keeping a logbook of your projects. This makes it easier to reproduce successful prints and troubleshoot problems.
Managing Costs and Sourcing Materials
One of the advantages of a small-scale studio is the ability to control expenses. Buy supplies in moderate quantities to avoid waste and keep inventory manageable. Look for local or online suppliers specializing in blank garments, textile inks, and printing accessories. Compare prices and request samples when possible.
Consider joining online communities or forums for home-based printers. These groups often share supplier recommendations, troubleshooting tips, and inspiration for new projects. Building relationships with suppliers can also lead to discounts as your business grows.
Maintaining and Upgrading Your Studio
Regular maintenance of your equipment ensures longevity and consistent print quality. Clean screens, nozzles, and heat presses after each session. Replace worn tools and keep an eye on ink expiration dates. As your skills develop, you may want to invest in more advanced equipment or expand your workspace.
Stay informed about new printing techniques and materials. The world of textile printing is constantly evolving, with innovations in digital printing, eco-friendly inks, and specialty finishes. Learning about developments such as digital textile printing’s role in the future of fabric production can help you stay ahead of trends and offer unique products.
Frequently Asked Questions
What is the best printing method for beginners in a home studio?
For most beginners, heat transfer printing is the easiest way to start. It requires minimal setup, is relatively affordable, and works well for small batches or personalized items. As you gain experience, you can explore screen printing or direct-to-garment methods for more complex designs.
How much space do I need for a small-scale fashion printing setup?
You can start with as little as a 6×8 foot area, provided you organize your equipment and supplies efficiently. A spare room, basement corner, or even a large table in a well-ventilated area can work. The key is to separate your design, printing, and drying zones for safety and workflow.
Are eco-friendly inks suitable for home fashion printing?
Yes, many water-based and eco-solvent inks are designed for home and small business use. They produce vibrant results and are safer for both the user and the environment. For more on this, see the difference between solvent and eco-solvent textile inks guide.


