Developing a comprehensive tech pack for all-over prints is essential for ensuring your designs are accurately produced and meet your creative vision. Whether you’re a fashion designer, product developer, or brand owner, a well-prepared tech pack streamlines communication with manufacturers and minimizes costly errors. This guide covers the critical steps, best practices, and key considerations for preparing a tech pack specifically for all-over print (AOP) garments and textiles.
All-over prints require special attention to detail, as the artwork covers the entire surface of the fabric and must align perfectly across seams and panels. By following a structured approach, you can achieve professional results and reduce back-and-forth with your production partners. For those interested in how these innovations are shaping the industry, you might also explore what is the future of smart textiles and printing for additional context on advanced printing trends.

Understanding All-Over Print Tech Packs
Unlike standard garment tech packs, those for AOP require additional details to ensure the print is applied seamlessly across the entire product. AOP tech packs must include precise artwork placement, repeat information, color references, and clear construction instructions. The main goal is to provide manufacturers with every detail needed to replicate your design without ambiguity.
Key differences between regular and AOP tech packs include:
- Artwork repeats and scaling: Ensuring the pattern repeats correctly and at the intended scale.
- Panel mapping: Showing how the print aligns across different garment sections.
- Color accuracy: Providing Pantone or digital color codes for consistent results.
- File formats: Supplying high-resolution, production-ready files.
Essential Components of an AOP Tech Pack
To create a thorough tech pack for all-over prints, include the following elements:
- Cover Page: Summarize the style, collection, and version history. This helps everyone stay organized and reference the correct document.
- Technical Sketches: Provide flat sketches (front, back, and side views) with clear indications of where the print will be placed. Use vector files for clarity.
- Artwork Placement and Repeat Details: Include a scaled mockup showing how the print covers the garment. Specify the repeat size (e.g., 50cm x 50cm) and whether it’s a straight or half-drop repeat.
- Color Specifications: List all colors with Pantone codes or digital references. Attach a color chart if possible.
- Fabric Information: Detail the fabric type, composition, weight, and finish. This affects how the print appears and feels.
- Construction Details: Describe stitching, seam placement, trims, and any special finishing techniques.
- Measurement Chart: Provide garment dimensions for each size, ensuring the print aligns correctly on all sizes.
- Labeling and Packaging: Specify label placement and packaging requirements, as these may affect print placement.
- Bill of Materials (BOM): List all components, including fabric, trims, threads, and accessories.
- Production Artwork Files: Attach high-resolution artwork files in the required format (usually AI, PSD, or TIFF). Indicate bleed areas and safe zones.
Preparing Artwork for All-Over Printing
One of the most critical steps in the process is preparing your print-ready artwork. For AOP, the design must be seamless and high-resolution to avoid visible lines or pixelation. Here’s how to get your artwork production-ready:
- Create seamless repeats: Use design software to ensure the pattern tiles perfectly in all directions. Test the repeat at full scale.
- Work in CMYK color mode: This matches most textile printers’ color profiles and helps maintain color consistency.
- Set the correct resolution: Artwork should be at least 150–300 DPI at actual print size.
- Include bleed and safe zones: Allow extra space around the edges to prevent white lines at seams or edges.
- Label layers and files clearly: Name files and layers according to garment panels and colorways for easy reference.
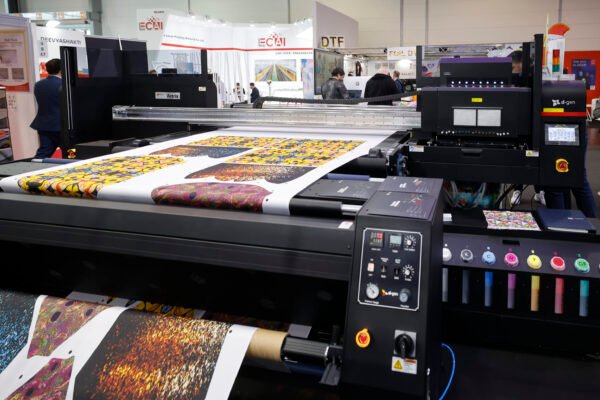
For a deeper dive into the technology behind digital textile printing, see this comprehensive explanation of digital textile printing.
Communicating Print Placement and Alignment
Clear communication of print placement is essential to avoid misalignment issues. Your tech pack should include:
- Panel mapping diagrams: Visual guides showing how the print aligns across seams, sleeves, collars, and other garment parts.
- Notations for critical alignment points: Mark areas where the print must match exactly (e.g., center front, side seams).
- Instructions for directional prints: Indicate if the print has a “top” or “bottom” and how it should be oriented on each panel.
Providing these details ensures the manufacturer understands your expectations and reduces the risk of costly sampling errors.

Best Practices for Working with Manufacturers
Once your tech pack is complete, sharing it effectively with your manufacturer is the next step. Here are some best practices:
- Send editable files: Provide both PDF and original design files so the factory can make minor adjustments if needed.
- Request a strike-off: Always ask for a printed fabric sample (strike-off) before full production to check colors and alignment.
- Maintain open communication: Be available to answer questions and provide clarifications quickly.
- Update tech packs as needed: Revise the document if any changes are made during sampling or production.
For those setting up their own studio, you may find it helpful to read about how to set up a small scale fashion printing studio for tips on managing your own production workflow.
Common Mistakes to Avoid in AOP Tech Packs
Even experienced designers can overlook important details when preparing tech packs for all-over prints. Avoid these common pitfalls:
- Omitting repeat size or scale: Always specify the exact repeat dimensions to prevent scaling errors.
- Ignoring fabric shrinkage: Account for potential shrinkage in both artwork and measurement charts.
- Unclear color references: Use standardized color codes rather than subjective descriptions.
- Missing alignment instructions: Failing to indicate how prints should match at seams can lead to unsatisfactory results.
- Sending low-resolution files: Low-quality artwork can result in blurry or pixelated prints.
Frequently Asked Questions
What file format should I use for all-over print artwork?
For best results, provide artwork in high-resolution formats such as AI, PSD, or TIFF. Ensure files are layered and editable, and always include a PDF version for easy viewing. Confirm with your manufacturer if they have specific requirements.
How do I ensure color consistency in production?
Always specify Pantone or digital color codes in your tech pack and request a strike-off sample before full production. This allows you to check color accuracy on the actual fabric and make adjustments if needed.
Can I use the same tech pack for different garment sizes?
You can use a single tech pack as a base, but you must provide a detailed measurement chart for each size and ensure the print aligns correctly on all sizes. Adjust artwork placement or scale if necessary to maintain a consistent look across the size range.
Conclusion
Creating a detailed and accurate tech pack for all-over prints is a crucial step in achieving high-quality, consistent results in garment production. By including all necessary artwork, specifications, and alignment instructions, you’ll minimize errors and streamline the manufacturing process. Remember to communicate clearly with your production partners and always review samples before moving to bulk production. With careful planning and attention to detail, your all-over print designs will stand out for their quality and precision.