When working with support structures in 3D printing, understanding their purpose and how to manage them is crucial for achieving high-quality results. These temporary frameworks enable the creation of complex shapes and overhangs that would otherwise be impossible to print. However, they also introduce challenges related to design, material usage, and post-processing.
In this guide, we’ll explore how to design effective supports, strategies for easy removal, and tips to minimize their impact on your finished parts. Whether you’re new to additive manufacturing or looking to refine your workflow, mastering supports can greatly improve your prints and expand the range of what you can create.

If you’re interested in learning more about designing models for additive manufacturing, check out how to design for 3D printing for practical tips on model preparation and best practices.
Why Support Structures Matter in Additive Manufacturing
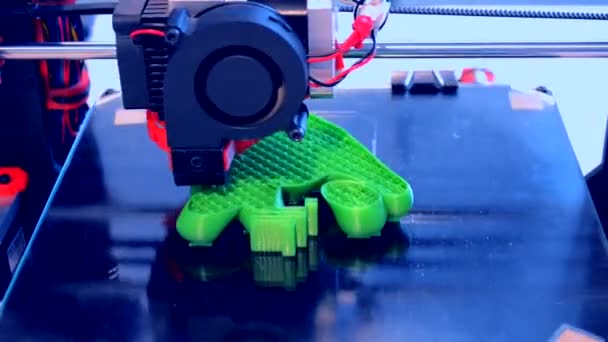
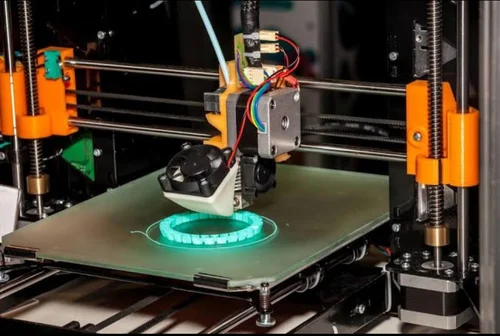
In most 3D printing processes, especially FDM (Fused Deposition Modeling) and SLA (Stereolithography), objects are built layer by layer. When a part has overhangs, bridges, or intricate features that extend into open space, the printer needs a temporary scaffold to prevent sagging or collapse. This is where support structures in 3D printing come into play.
Supports are essential for:
- Enabling the printing of complex geometries and undercuts
- Maintaining dimensional accuracy and surface quality
- Preventing print failures due to gravity or lack of material beneath overhangs
However, supports also add to print time, material consumption, and post-processing effort. Balancing their necessity with efficient design is a key skill for anyone working with additive manufacturing.
Types of Support Structures Used in 3D Printing
There are several common types of supports, each suited to different printing technologies and part geometries:
- Grid or Lattice Supports: These provide a strong, stable base for overhangs and are widely used in FDM printing.
- Tree Supports: Branch-like structures that minimize contact with the model, reducing scarring and material use.
- Linear Supports: Simple, straight columns often used for small overhangs or bridging features.
- Dissolvable Supports: Made from materials like PVA or HIPS, these can be removed by soaking in water or a solvent, ideal for intricate or delicate parts.
The choice of support type depends on your printer, material, and the specific requirements of your model. For more on handling intricate shapes, see our article on printing complex geometries.
Designing Models to Minimize Support Needs
Reducing reliance on supports not only saves time and material but also leads to cleaner finished parts. Here are some practical strategies:
- Optimize Overhang Angles: Most printers can handle overhangs up to 45 degrees without support. Adjust your model to stay within this limit where possible.
- Split Complex Models: Break large or intricate objects into smaller sections that print without supports, then assemble them post-printing.
- Use Chamfers and Fillets: Replacing sharp overhangs with angled or rounded features can reduce the need for scaffolding.
- Orient the Model Strategically: Positioning your part to minimize unsupported areas can make a significant difference.
For more guidance on preparing your files, our resource on 3D printing file formats explained covers how to export and adjust models for optimal results.
Best Practices for Generating and Placing Supports
Slicing software typically offers automated support generation, but manual adjustments often yield better outcomes. Consider these tips:
- Customize Support Density: Use denser supports only where absolutely necessary, and reduce density elsewhere to save material.
- Adjust Support Interface Layers: Fine-tune the number of interface layers for easier removal and a smoother surface finish.
- Limit Contact Points: Minimize the area where supports touch your model to reduce scarring and simplify cleanup.
- Preview in Slicer: Always review the generated supports in your slicer’s preview mode to catch potential issues before printing.
Experimenting with different support settings and observing the results is the best way to develop an efficient workflow tailored to your printer and materials.
Removing Supports: Tools and Techniques
Once printing is complete, careful removal of supports is essential to preserve the quality of your part. Here are some recommended steps:
- Use the Right Tools: Needle-nose pliers, flush cutters, and hobby knives are commonly used for mechanical removal.
- Work Slowly: Remove supports gently to avoid damaging the model, especially in delicate areas.
- Sand and Finish: After removal, use fine-grit sandpaper or files to smooth any rough spots or scars left behind.
- Dissolvable Supports: For water-soluble or chemical supports, follow manufacturer instructions for soaking and rinsing.
Always wear safety glasses and gloves when working with sharp tools or chemicals. For more design-focused advice, our post on 3D modeling tips for printing can help you anticipate and address support-related challenges during the modeling stage.
Material Considerations for Support Structures
The choice of material for both the model and its supports affects ease of removal and final appearance. Some key points to consider:
- Same-Material Supports: Most desktop FDM printers use the same filament for both model and supports, which can make removal more challenging.
- Dual-Extruder Setups: These allow for printing supports in a different, often dissolvable, material—making post-processing much easier.
- Resin Printing: SLA and DLP printers use liquid resin, and supports are typically clipped away after curing. Proper orientation and support thickness are especially important for resin prints.
For a deeper dive into the basics of additive manufacturing, this detailed guide to 3D printing technology offers a comprehensive overview of processes and materials.
Common Problems and How to Avoid Them
Even with careful planning, issues can arise when working with support structures. Here are some frequent challenges and solutions:
- Scarring or Rough Surfaces: Minimize contact points and use tree supports to reduce visible marks on your model.
- Supports Fusing to Model: Adjust the Z-gap or interface layers in your slicer to ensure supports detach cleanly.
- Difficulty Removing Supports: Use dissolvable materials or increase the air gap between supports and the model.
- Warping or Print Failure: Ensure adequate support under large overhangs and monitor print settings for proper adhesion.
Regularly updating your slicing software and experimenting with new support algorithms can also help address persistent issues.
FAQ: Support Structures and 3D Printing
What are the main reasons to use supports in 3D printing?
Supports are necessary for printing overhangs, bridges, and complex geometries that would otherwise lack a foundation during the build process. They help maintain accuracy and prevent print failures.
How can I reduce the amount of support material needed?
By optimizing your model’s orientation, using chamfers or fillets, and designing within your printer’s overhang capabilities, you can significantly cut down on the need for additional scaffolding.
What is the best way to remove supports without damaging my print?
Use proper tools like pliers and cutters, work slowly, and consider using dissolvable supports for complex or delicate areas. Sanding and light finishing can help smooth any marks left behind.
Do all 3D printers require support structures?
Not all printers or models require supports. Simpler shapes and certain technologies, like SLS (Selective Laser Sintering), can often print complex objects without them. However, for most FDM and resin printers, supports are essential for reliable results.
Conclusion
Mastering the use of support structures in 3D printing is essential for anyone aiming to produce high-quality, complex parts. By understanding when and how to use supports, optimizing your designs, and employing best practices for removal, you can achieve cleaner prints and expand your creative possibilities. For beginners, exploring resources like CAD for 3D printing beginners can further enhance your skills and confidence in tackling challenging projects.