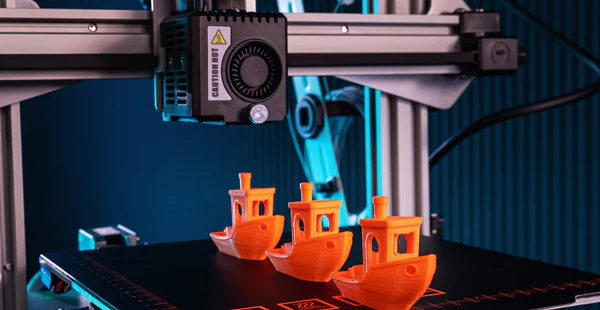
Achieving a high-quality finish on your 3D printed objects often requires more than just removing them from the printer. Post processing 3D prints involves a series of steps that can dramatically improve the look, feel, and durability of your models. Whether you’re working with FDM, SLA, or resin-based printers, understanding the right techniques for sanding, finishing, and painting will help you transform rough prints into polished, professional-looking pieces.
This guide covers essential methods for smoothing surfaces, filling imperfections, and applying paint to enhance the final appearance of your 3D creations. If you’re interested in optimizing your designs before printing, you might also find value in exploring how to design for 3D printing to ensure your models are well-suited for post-processing.
Why Post-Processing Is Essential for 3D Printed Parts
While 3D printing technology has advanced rapidly, most prints—especially those made with FDM or resin printers—display visible layer lines, minor surface defects, or support marks. These imperfections can detract from the appearance and functionality of your models. Post processing 3D prints helps to:
- Remove layer lines and smooth rough surfaces
- Fill gaps, holes, or seams
- Prepare surfaces for painting or other coatings
- Increase durability and longevity
- Achieve a professional, finished look
Investing time in these finishing steps is especially important for display pieces, prototypes, or functional parts that require a refined appearance.
Preparing Your 3D Prints for Smoothing and Finishing
Before you begin sanding or painting, it’s important to properly prepare your printed object. Start by carefully removing any support structures using flush cutters or a hobby knife. Take care not to gouge or damage the surface. For prints with complex shapes, patience and precision are key.
Once supports are removed, gently wash the print to eliminate dust, oils, or leftover resin. For resin prints, a rinse in isopropyl alcohol is often necessary to fully cure and clean the surface. Allow the part to dry completely before moving on to sanding or filling.
Sanding Techniques for Smoother Surfaces
Sanding is a fundamental step in post processing 3D prints. It helps to remove visible layer lines and creates a uniform surface for painting. Here’s how to approach sanding:
- Start with a coarse grit: Begin with 100–200 grit sandpaper to knock down the most prominent ridges. Sand gently in a circular motion, taking care not to flatten details or edges.
- Progress to finer grits: Move up to 400, 600, and even 1,000 grit sandpaper for a smoother finish. Wet sanding (using water with the sandpaper) can reduce dust and achieve a finer result.
- Use sanding sponges or files: For curved or intricate areas, flexible sanding sponges or needle files can help reach tight spots without damaging the model.
- Inspect regularly: Wipe the surface clean between grits to check your progress and avoid embedding debris.
Filling Gaps and Imperfections
Even after thorough sanding, some prints may have small holes, seams, or other flaws. Filling these imperfections is crucial for a flawless finish. Common materials for filling include:
- Plastic putty: Ideal for FDM prints, this air-drying filler can be applied with a spatula and sanded smooth after curing.
- Epoxy resin: For larger gaps or structural repairs, two-part epoxy provides a strong, sandable surface.
- CA glue and baking soda: A quick fix for tiny holes—apply cyanoacrylate glue and sprinkle baking soda for an instant, sandable fill.
After filling, allow the material to cure fully before sanding again with fine grit paper. Repeat as needed for a seamless surface.
Priming and Painting Your 3D Models
Once your print is smooth and free of defects, it’s time to prime and paint. Priming is an essential step that helps paint adhere evenly and reveals any remaining imperfections.
- Apply a suitable primer: Use a spray primer designed for plastics. Hold the can 15–20 cm from the model and apply light, even coats. Let each coat dry before adding another.
- Sand between coats: For the smoothest finish, lightly sand the primed surface with 600–1,000 grit paper between coats.
- Choose the right paint: Acrylic paints work well for most 3D prints. For a glossy or metallic effect, specialty spray paints or airbrushes can be used.
- Seal the finish: Once painting is complete, protect your work with a clear acrylic sealer in matte, satin, or gloss, depending on your preference.
Tips for Different 3D Printing Materials
The techniques for post processing 3D prints can vary depending on the material used:
- PLA: Easy to sand and paint, but can soften with too much friction. Use gentle pressure and avoid high-speed rotary tools.
- ABS: Can be smoothed with acetone vapor for a glossy finish, but requires careful handling due to fumes.
- PETG: More flexible and resistant to sanding; use finer grits and take your time.
- Resin prints: Often have a smoother starting surface but may be brittle. Sand with care and always wear gloves and a mask when working with uncured resin.
For a deeper dive into materials and their properties, check out this comprehensive overview of 3D printing technologies and materials.
Common Mistakes to Avoid in the Finishing Process
Even experienced makers can run into issues when refining their prints. Here are some pitfalls to watch for:
- Skipping the cleaning step, leading to poor paint adhesion
- Using too much force when sanding, which can deform or damage the print
- Applying thick coats of primer or paint, causing drips and loss of detail
- Neglecting to wear protective gear, especially when working with resins or solvents
- Not allowing adequate drying or curing time between steps
Taking a methodical, patient approach will yield the best results and help you avoid these common errors.
FAQ: Smoothing, Painting, and Perfecting 3D Prints
What is the best way to smooth FDM 3D prints?
The most effective method is progressive sanding, starting with a coarse grit and moving to finer grits. For ABS prints, acetone vapor smoothing can also be used, but it requires careful handling and ventilation.
Can I use regular spray paint on 3D printed objects?
Yes, most spray paints designed for plastics work well on 3D prints. For best results, always use a primer first, apply thin coats, and allow each layer to dry thoroughly.
How do I fill gaps or seams in my 3D prints?
Plastic putty, epoxy resin, or a combination of CA glue and baking soda are popular options. Apply the filler, let it cure, and sand smooth before priming and painting.
Conclusion
Mastering post processing 3D prints can elevate your projects from basic prototypes to impressive, display-ready models. By following the steps outlined here—preparation, sanding, filling, priming, and painting—you’ll achieve smoother surfaces and vibrant finishes. For more insights into optimizing your print files, consider reading about 3D printing file formats explained or explore advanced topics like printing complex geometries to further enhance your 3D printing skills.