Transferring designs onto dark fabrics can be quite a challenge due to their non-reflective nature. However, with the right approach and materials, it becomes a tremendous opportunity to create stunning custom designs. In this guide, we’ll explore the process of how to use dark fabric transfer paper, a popular method for achieving vibrant prints on dark textiles. This technology is here to make your crafting experience delightful and approved by many crafting enthusiasts.
Understanding Dark Fabric Transfer Paper
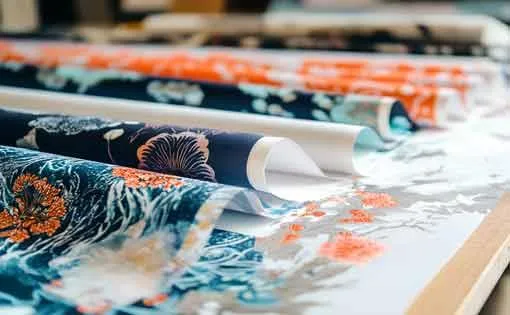
Dark fabric transfer paper is specially designed to transfer images onto dark or black fabrics. Unlike regular transfer paper, which is often used for light-colored garments, dark fabric transfer paper ensures that the colors of the print appear vibrant and accurate on darker backgrounds. It’s important to know how this paper works to make the most out of your textile printing projects.
Components and Functionality
This special transfer paper is coated with a layer that contains the image to be transferred. During the transfer, the coating adheres to the fabric, thanks to the heat and pressure applied during the process. The printed side of the paper is what gets pressed onto the fabric, leaving the rest of the paper as the backing. This ensures no residue or clear film is visible on the final product.
Why Dark Fabric Transfer Paper?
The use of dark fabric transfer paper is growing tremendously. It provides a solution for those wanting to personalize black or other dark-colored fabric items, ranging from t-shirts to tote bags and more.
Necessary Supplies
To embark on your dark fabric transfer paper project, gather the following supplies:
- Dark fabric transfer paper
- An inkjet printer
- Scissors or a crafting knife
- A heat press or household iron
- Dark fabric item such as a t-shirt
- Protective material such as parchment paper
Step-by-step Guide on How to Use Dark Fabric Transfer Paper
Step 1: Design Preparation
Ensure your design is ready for printing. Software like Adobe Illustrator or Photoshop can assist in creating precise designs. Ensure the image resolution is high for the best results. Remember that the design wont need to be mirrored; this is crucial as opposed to light fabric transfers.
Step 2: Print Your Design
Utilize an inkjet printer to print the design onto the dark fabric transfer paper. It’s critical to follow the paper manufacturer’s instructions for loading the paper correctly. This typically involves printing on the coated side of the paper.
Step 3: Cutting and Preparing
Once printed, carefully cut around the design to avoid extra clear film visible on your final product. Precision is key here to make your design look professional. Use scissors or an exacto knife for intricate designs.
Step 4: Pre-press Your Fabric
Before transferring, ensure the fabric is pre-washed and iron out wrinkles. A flat surface will offer the best adherence for your transfer paper.
Step 5: Transfer Process
Place your design face-up on the fabric and cover it with parchment paper. Applying consistent heat and pressure with a heat press or iron ensures a smooth and lasting application. Refer to your transfer paper’s instructions for the exact time and temperature settings.
Common Mistakes and How to Avoid Them
Incorrect Temperature
Make sure your heat source is at the right temperature as specified by the transfer paper manufacturer. Too hot or too cold can ruin the transfer.
Skipping the Pre-wash
Always pre-wash fabrics to avoid shrinking and ensure the best adherence and longevity of your transfers.
Post-Transfer Care
After transferring your design onto the fabric, its crucial to maintain care to ensure longevity. Wait at least 24 hours before washing the fabric. When you do, turn it inside out and wash it in cold water. Avoid tumble drying for the best results.
Troubleshooting
If the transfer is peeling off, consider re-applying heat with a piece of protective paper and ensuring even pressure. Wrinkles under the transfer are a sign that your fabric wasn’t completely flat during the process.
Creative Uses Beyond T-shirts
This technique isn’t limited to t-shirts alone. You can use dark fabric transfer papers on pillows, backpacks, or fabric used for home dcor, allowing for innovative and personalized designs in a countless array of applications.
Conclusion: Carry Your Creativity
With dark fabric transfer paper, the possibilities are immense. It’s a technology that is sure to leave you delighted as you see your own design ideas come to life. Get started with your next big craft project and enjoy the satisfaction of custom textile art.
Further Learning and Resources
Explore more about textile printing on our informative guides like Print on Demand Guide and discover the world of Custom Label Creation with Canva.
FAQ: How to Use Dark Fabric Transfer Paper
1. Can I use regular printers for the transfer?
Yes, an inkjet printer is typically suitable for printing on dark fabric transfer paper. Follow the manufacturer’s guidance for optimal results.
2. What fabrics are best for using transfer paper?
Cotton and cotton blends are excellent choices as they adhere well and distribute heat evenly during the transfer process.
3. Is it reusable?
No, dark fabric transfer paper is not reusable; it is a single-use product designed for one-time transfers.