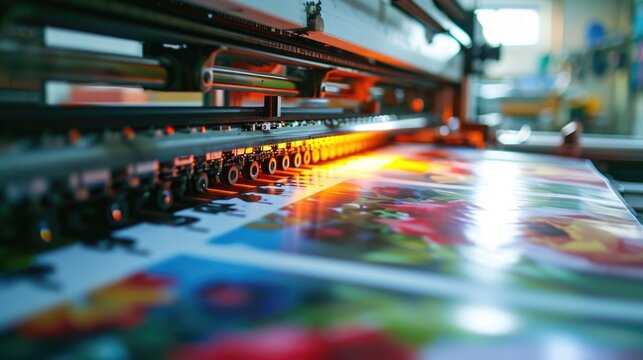
Introduction to Printing Wall Stickers
Welcome! In today’s era of creative expression, knowing how to print wall stickers has become a fascinating endeavor for many. Wall stickers are a delightful way to enhance the aesthetics of any space, be it home or office. They give life to your walls with tremendous possibilities. This article aims to unveil the process, tools, and tips for creating these captivating visuals that stick.

What Are Wall Stickers?
Wall stickers, often known as wall decals, are specialized stickers designed to be affixed on walls for decorative purposes. These are more robust than regular stickers and come in a wide range of designs and sizes. They can transform dull walls into exciting canvases.
Understanding the Material
Wall stickers are made of vinyl and feature an adhesive on one side. This material provides durability and ease of application, allowing for repositioning if necessary. Their ease of use and removal makes them a preferred choice for many.
Why Choose to Print Your Own Wall Stickers?
Printing your wall stickers allows you to customize and fully express personal creativity. It gives you control over the design and size, leading to a more personalized result rather than relying on commercial options.
Benefits of Printing Your Own Wall Stickers
Personalized Designs
One of the most significant benefits is the freedom to create unique designs tailored to your taste. Whether it’s a custom quote, a family portrait, or a vivid illustration, the possibilities are endless.
Cost-Effective
Creating your wall stickers can be more economical than purchasing pre-made versions, especially if you require specific sizes or designs unavailable commercially.
What You Need to Get Started
Before you start printing, certain materials and equipment are necessary:
Essential Tools and Materials
Printer
You will need a printer capable of handling vinyl printing. Inkjet and laser printers can both be used, but ensure they are compatible with the vinyl material to avoid any mishaps.
Vinyl Paper
Specialized vinyl paper is required, which can be purchased from office supply stores or online. Ensure the paper matches your printer’s specifications.
Design Software
Software like Adobe Illustrator, CorelDRAW, or even Photoshop can be utilized to craft your designs. For those less inclined towards graphic design, visit us for easy-to-use options.
Designing Your Wall Sticker
Designing is arguably the most exciting step in the process. Lets break it down:
Conceptualizing Your Design
Choosing Your Theme
Decide on the theme of your sticker. Whether its geometric patterns, floral arrangements, or abstract art, ensuring your theme aligns with the room’s overall aesthetic is crucial.
Color Selection
Colors add vibrance to designs, so consider the existing color palette of the room. Bright and bold for children’s rooms, or neutral and calming for serene spaces?
Using Design Software
Begin with a Template
Using pre-existing templates can ease the design process. Start simple and modify to fit your vision. Many software programs offer a range of templates suited to various needs.
Customizing Features
Typography, shapes, and images can be manipulated to craft your perfect sticker. Don’t hesitate to experiment!
Printing Your Design
Once your design is ready, it’s time to bring it to life. Printing requires particular attention to detail:
Setting Up Your Printer
Ensure the printer is equipped with the correct ink and set to the necessary resolution for high-quality prints.
Printer Settings
Adjust your printer to its highest quality setting. This ensures that your colors and details appear as vivid as they were on your screen.
Loading Vinyl Paper
Follow your printers instructions to load the vinyl paper correctly. Avoid mishaps by ensuring the paper is aligned correctly.
The Application Process
Preparing the Surface
Before applying your wall sticker, the wall must be clean and dry. Dust and dirt can prevent proper adhesion.
Applying the Sticker
Wall stickers are designed for easy application:
Positioning
Use a level to ensure your sticker is straight. It might be helpful to have a friend assist with larger designs to prevent wrinkles and bubbles.
Smoothing
Once in place, use a squeegee or credit card to press the sticker firmly against the wall, eliminating any air bubbles.
Click here if you want more professional services.
Maintaining Your Wall Sticker
Maintenance ensures longevity and vibrancy:
Cleaning
Avoid harsh chemicals. A gentle wipe with a damp cloth will do.
Conclusion
Creating and applying wall stickers can add a delightful burst of art to your walls. With this guide on how to print wall stickers, you’re ready to embark on a creative journey. Enjoy the artistic freedom and the ability to rejuvenate any space with this technology.

FAQs
What kind of printer do I need for wall stickers?
An inkjet or laser printer compatible with vinyl paper is recommended for printing high-quality wall stickers.
How do I remove wall stickers without damaging the paint?
Gently peel the sticker from the wall. If it’s stubborn, use a hairdryer to heat the adhesive, making it easier to remove.
Can I reposition a wall sticker after applying it?
Many wall stickers are designed to be repositionable, but it’s best to check the specifications of your chosen vinyl before application.


