The world of 3D printing has rapidly evolved from a niche technology to a widely accessible tool for hobbyists, engineers, educators, and businesses. Understanding how 3D printing works is essential for anyone interested in creating objects from digital designs, whether for prototyping, manufacturing, or personal projects. This guide breaks down the process into clear, manageable steps, making it easy for beginners to grasp the fundamentals and get started with their own creations.
Before diving into the details, it’s helpful to know that 3D printing, also known as additive manufacturing, builds objects layer by layer from a digital file. This method opens up endless possibilities for customization and innovation. If you’re curious about the broader applications and technical aspects, resources like the comprehensive 3D printing guide from Hubs offer additional insights.

As you explore the basics, you’ll discover the essential steps, key materials, and common challenges involved in bringing digital models to life. Whether you’re considering your first printer or simply want to understand the workflow, this article will guide you through each stage of the process.
Understanding the Basics of Additive Manufacturing
At its core, additive manufacturing refers to creating three-dimensional objects by adding material layer by layer, rather than removing material as in traditional machining. This approach allows for complex shapes and internal structures that would be difficult or impossible to achieve with other methods.
The most common types of 3D printing technologies include:
- Fused Deposition Modeling (FDM): Melts and extrudes thermoplastic filament to build objects layer by layer.
- Stereolithography (SLA): Uses a laser to cure liquid resin into solid plastic, layer by layer.
- Selective Laser Sintering (SLS): Fuses powdered material using a laser.
Each technology has its advantages and is suited to different applications, but the overall workflow remains similar for most desktop 3D printers.
Preparing Your 3D Model for Printing
The first step in the process is creating or obtaining a digital 3D model. This model serves as the blueprint for your physical object. You can design your own using CAD (Computer-Aided Design) software, or download ready-made models from online repositories.
Once you have your model, it needs to be converted into a format that the printer can understand, typically an STL or OBJ file. The next stage is slicing, where specialized software divides the model into thin horizontal layers and generates the instructions (G-code) the printer will follow.
Key considerations during this phase include:
- Ensuring the model is watertight (no holes or gaps in the mesh).
- Orienting the model for optimal strength and minimal support material.
- Adjusting layer height, infill density, and print speed for desired quality and strength.
After slicing, the G-code file is transferred to the printer, usually via SD card, USB, or direct connection.
Setting Up the Printer and Materials
With your sliced file ready, it’s time to prepare the printer. This step is crucial for a successful print and involves several tasks:
- Leveling the print bed: Ensures the first layer adheres properly and the object is built accurately.
- Loading the filament or resin: For FDM printers, insert the filament spool and feed it into the extruder. For resin printers, pour the liquid resin into the vat.
- Preheating: Set the correct temperature for the print bed and nozzle (FDM) or ensure the resin is at optimal temperature (SLA).
- Cleaning: Make sure the build surface is free of dust, oil, or leftover material from previous prints.
Proper setup minimizes issues like warping, poor adhesion, or failed prints. Many modern printers offer automatic bed leveling and guided setup to simplify this process.
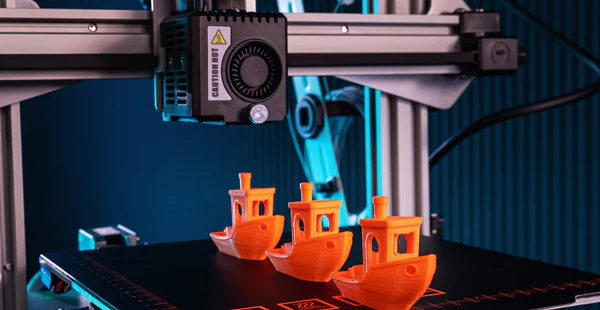
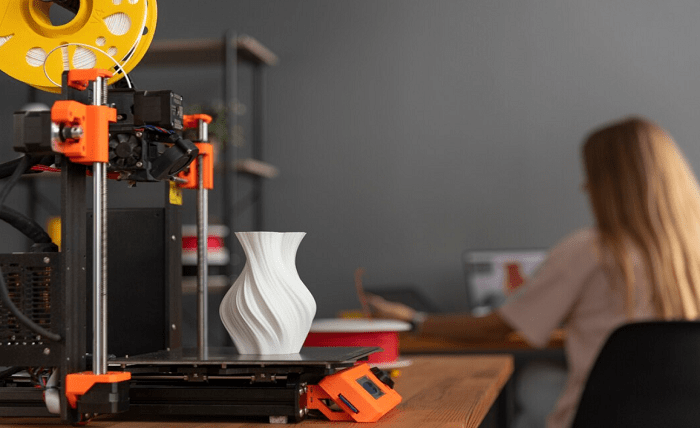
Printing: From Digital File to Physical Object
Once everything is set, start the print job. The printer will follow the G-code instructions, building the object layer by layer. During printing, it’s important to monitor the process, especially for the first few layers, to catch any problems early.
Depending on the size and complexity of the object, printing can take anywhere from a few minutes to several hours. Some tips for a smooth experience:
- Keep the printer in a stable environment, away from drafts and temperature fluctuations.
- Have spare filament or resin available for longer prints.
- Check periodically for filament jams, layer shifts, or adhesion issues.
When the print is complete, allow it to cool before removing it from the build plate. Resin prints may require additional post-processing, such as washing and curing under UV light.
Post-Processing and Finishing Touches
After printing, most objects require some degree of post-processing. The steps vary depending on the printer and material used:
- Removing supports: Many prints have support structures that must be carefully detached.
- Sanding and smoothing: Surfaces can be sanded for a smoother finish or to prepare for painting.
- Cleaning: Resin prints often need to be washed in isopropyl alcohol and cured under UV light.
- Assembly: Multi-part prints may require gluing or snapping pieces together.
These finishing steps can greatly enhance the appearance and durability of your printed objects.
Common Challenges and Troubleshooting Tips
Even with careful preparation, issues can arise during the printing process. Here are some frequent problems and solutions:
- Poor bed adhesion: Ensure the bed is level and clean; use adhesives like glue stick or painter’s tape if needed.
- Stringing or blobs: Adjust retraction settings and nozzle temperature.
- Layer shifting: Check for loose belts or obstructions in the printer’s movement.
- Incomplete prints: Make sure there is enough filament or resin and that the printer is not overheating.
Regular maintenance and calibration help prevent many of these issues. Online forums and manufacturer support are valuable resources for troubleshooting specific problems.
Frequently Asked Questions
What materials can be used in 3D printing?
The most common materials are thermoplastics like PLA and ABS for FDM printers, and photopolymer resins for SLA printers. Advanced users may also work with nylon, TPU, PETG, and even metal or ceramic powders for specialized applications.
Is 3D printing safe for home use?
Yes, most desktop 3D printers are designed for safe use at home. However, it’s important to operate them in well-ventilated areas, especially when printing with ABS or resins, as fumes can be harmful. Always follow manufacturer safety guidelines.
How long does it take to print an object?
Print times vary widely based on object size, layer height, and printer speed. Small models may take under an hour, while larger or highly detailed prints can require several hours or even days.
Conclusion: Getting Started with 3D Printing
Learning how 3D printing works opens up a world of creative and practical possibilities. By following the steps outlined here—from preparing your model and setting up the printer to post-processing and troubleshooting—you can confidently begin your journey in additive manufacturing. As you gain experience, you’ll discover new techniques and applications, making this technology a valuable tool for innovation and problem-solving.