Creating successful 3D prints starts long before you hit the “print” button. The foundation of a reliable, high-quality print lies in how you design your model. Whether you’re a hobbyist or a professional, understanding the nuances of digital modeling for additive manufacturing can save you time, money, and frustration. This guide shares essential 3D modeling tips for printing, focusing on practical strategies to sidestep the most frequent design pitfalls.
From wall thickness to overhangs, each design choice impacts printability and final part strength. By applying best practices and leveraging the right tools, you can ensure your models are not only visually impressive but also structurally sound and easy to print. If you’re interested in exploring software options, our resource on open source 3D printing software offers a comprehensive overview for all skill levels.
Understanding Printability: Key Factors in 3D Model Design
Before you start modeling, it’s important to understand how your design choices affect the printing process. Not all shapes and features translate well from digital files to physical objects. Here are some foundational 3D modeling tips for printing to keep in mind:
- Wall Thickness: Thin walls can lead to fragile prints or failed builds. Always check your printer’s minimum wall thickness guidelines and reinforce thin areas as needed.
- Overhangs and Bridges: Unsupported overhangs may sag or collapse. Design with self-supporting angles (usually 45° or less) and add supports where necessary.
- Detail Resolution: Fine details may not be captured if they’re smaller than your printer’s nozzle or resin capabilities. Scale up intricate features or simplify them for better results.
- Manifold Geometry: Ensure your model is “watertight”—all surfaces must be closed and connected, with no holes or non-manifold edges.
For a deeper dive into how 3D printers interpret your models, the Department of Energy’s guide on how 3D printers work provides useful background on the technology.
Common Design Mistakes and How to Avoid Them
Even experienced designers can run into issues that compromise print quality or cause outright failures. Let’s look at some of the most frequent errors and how to prevent them with smart modeling practices.
Ignoring Minimum Feature Sizes
Every printer has limits for how small it can reliably print features. If your design includes tiny holes, text, or embossed details, verify that these are above your machine’s minimum feature size. Otherwise, they may not appear at all or could result in weak spots.
Poorly Supported Overhangs
Overhangs greater than 45° often require supports, especially with FDM printers. If your model has large horizontal sections or bridges, consider redesigning with gradual slopes or splitting the part for easier printing. For resin printers, pay attention to the orientation and add supports in your slicer.
Non-Manifold Edges and Open Surfaces
A model must be a single, closed volume to be printable. Non-manifold geometry—such as edges shared by more than two faces or holes in the mesh—can confuse slicing software and result in failed prints. Use your modeling software’s analysis tools to check for and repair these issues before exporting your file.
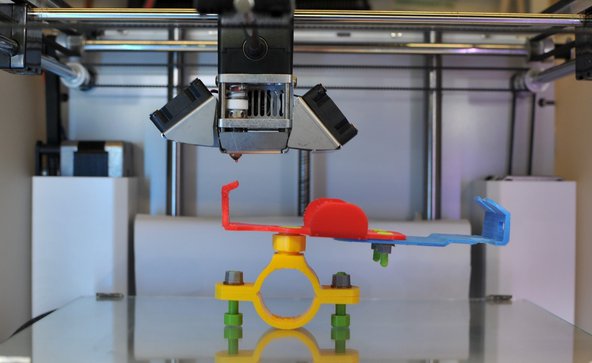
Overlooking Print Orientation
The way you orient your model on the print bed affects strength, surface quality, and support requirements. For example, tall, thin parts are prone to wobbling, while flat orientations may minimize layer lines on visible surfaces. Experiment with different orientations in your slicer to find the best balance for your design.
Optimizing Models for Different Printing Technologies
Not all printers are created equal. FDM, SLA, and SLS machines each have unique strengths and limitations. Tailoring your design for the intended technology is a crucial 3D modeling tip for printing that can dramatically improve your results.
- FDM (Fused Deposition Modeling): Avoid steep overhangs, use fillets instead of sharp corners, and ensure all parts are well-supported.
- SLA/DLP (Resin Printing): Watch for cupping (trapped resin in hollow parts), orient for minimal supports, and include drain holes in hollow models.
- SLS (Selective Laser Sintering): Allows for more complex geometries and interlocking parts, but be mindful of powder removal from internal cavities.
For those working with resin-based machines, our article on resin printing safety covers essential best practices for both home and lab users.
Preparing Your Model for Slicing and Printing
Once your design is complete, preparing it for the printing process is the next step. Here’s how to ensure your model is ready for a smooth transition from screen to physical object:
- Export in the Correct Format: STL and OBJ are the most common file types for 3D printing. Double-check export settings to maintain scale and detail.
- Check for Errors: Use mesh analysis tools to detect and fix holes, non-manifold edges, or inverted normals.
- Scale Appropriately: Make sure your model fits within your printer’s build volume and is sized for its intended use.
- Test with Slicer Software: Load your file into your preferred slicer to preview layers, supports, and estimated print time. Our guide on the best slicer software for 3D printing can help you compare features and choose the right tool.
Advanced Tips for Reliable and High-Quality Prints
Once you’ve mastered the basics, consider these advanced strategies to further improve your results and avoid common issues:
- Use Fillets and Chamfers: Sharp corners are stress concentrators and can lead to cracking. Adding fillets or chamfers distributes stress and improves printability.
- Design for Assembly: If your object is complex, split it into multiple parts for easier printing and assembly. This approach can also help you avoid excessive supports and improve surface finish.
- Incorporate Tolerances: For parts that must fit together, leave appropriate clearances based on your printer’s accuracy. Test fit with prototypes and adjust as needed.
- Hollow Out Large Models: Hollowing reduces material use and print time. Just remember to add drain holes for resin prints and ensure structural integrity for FDM models.
- Stay On Top of Maintenance: Regular printer upkeep is essential for consistent results. Check out our 3D printer maintenance tips to keep your machine running smoothly.
Frequently Asked Questions
What is the most common mistake in 3D modeling for printing?
The most frequent issue is designing models with non-manifold geometry or open surfaces. These errors prevent the slicer from generating proper toolpaths, leading to failed prints. Always use your modeling software’s analysis tools to check for and repair these problems before exporting your file.
How do I choose the right wall thickness for my model?
Wall thickness depends on your printer and material. As a rule of thumb, keep walls at least 1–2 mm thick for FDM printers and 0.5–1 mm for resin printers. Consult your printer’s documentation for specific recommendations, and reinforce thin areas if the part will be under stress.
Why does my print have rough surfaces or visible lines?
Layer lines and rough surfaces are often caused by incorrect print orientation, insufficient cooling, or poor slicer settings. Try reorienting your model, adjusting layer height, or using a higher-quality slicer. For smoother results, post-process prints by sanding or using chemical smoothing techniques.
Can I use any 3D modeling software for printing?
Most CAD and modeling programs can export printable files, but some are better suited for the task. Look for software that supports mesh analysis and repair, and consider exploring open source 3D printing software options for flexibility and community support.
Conclusion
Mastering 3D modeling tips for printing is essential for anyone looking to achieve reliable, high-quality results. By understanding the limitations of your printer, designing with printability in mind, and preparing your models carefully, you can avoid the most common errors and bring your ideas to life with confidence. Keep learning, test your designs, and don’t hesitate to iterate—each print is a step closer to perfection.
For more guidance on calibration, check out our article on how to calibrate a 3D printer for accurate prints.